If you're experiencing an oil leak coming from the rear of your Porsche 944 then it is probably coming from the transmission/gearbox's oil filling plugs (there are two) or more likely one/both of the drive axle seals (one either side where the drive axle meets the transmission). Other symptoms include harder than usual shifting or transmission whine due to lack of transmission oil. Having replaced the filling plugs for new ones at the last gearbox oil change it was pretty easy to trace the black greasy patch on the underside of the transmission to both the drive axle oil seals - they simply needed replacing.
THE TASK
I used the following:
8mm Spline Bit
8mm Hex Socket
17mm Hex Socket
Socket Ratchet Spanner
Torque Wrench
Socket Extension Bar
Small/Medium Heel Pry Bar or Seal Puller Tool
Seal Press or 38-40mm socket
Rubber Mallet
2 x Radial Shaft Seals (Porsche OEM Part number 016 409 399 B)
1 x Large Zip Tie or Length Of String/Rope
Spray Degreaser
Oil Drain Pan.
Stiff Scrubbing Brush
Axle Stands
Trolley Jack
Swepco 201 Gear Oil
Anti-seize thread lubricant
White Spirit
Karcher Powerwasher (optional)
THE HOW TO
(Amateur mechanic job time approx: 2-3 hours).
Start by raising the rear of the car and support on axle stands (the higher you can get the rear off the floor the easier the job becomes). As you can see from the photos below the seals on mine were leaking quite badly from both sides.

Depending how badly the seals have been leaking now might be the time to give the transmission underside a blast with the powerwasher and degreaser. The purpose of this is it makes the job a lot less messy and enables you to check for leaks once the job is complete.
Now follow my tutorial on how to remove the transmission oil, you will also need to refer to this when it comes to refilling the transmission once you've replaced the seals.
With the oil drained it's now time to remove drive axles where they meet the transmission. Start with the one that isn't under the exhaust (shown below) as it is the easier of the two and is a good way of getting a clear idea of what needs to be done when you start the slightly obstructed exhaust side.

To release the drive axle you need to undo 8 x 8mm spline screws. Make sure the spline bit goes in straight and not at an angle otherwise you risk rounding off the spline bit and probably the screw too. If you find it difficult to get a good angle on some of them then simply release the handbrake and rotate the wheel to improve the access.
With the spline screws removed you should now be able to move one end of the axle. Find a suitable place to hang the drive axle out of the way and cover the end with a plastic bag (this stops any grit getting stuck to grease in the universal joint).
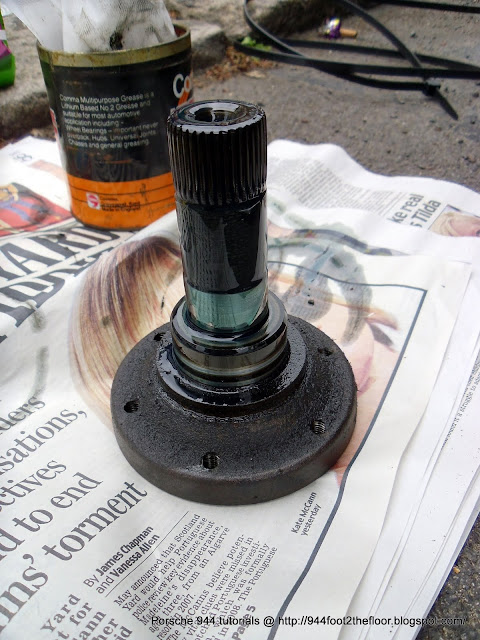
The next step involves removing the flanged shaft. Start by poking an old screwdriver all the way through one of the empty spline screw holes, this stops the flange from moving when you release the 8mm hex screw from it's centre. Use a socket wrench with extension bar and 8mm hex bit to undo the centre screw as shown below.

Once the screw is removed the flanged axle should simply slide out. Give it a good clean and check there's no wear or rough areas on the axle near the flanged end.
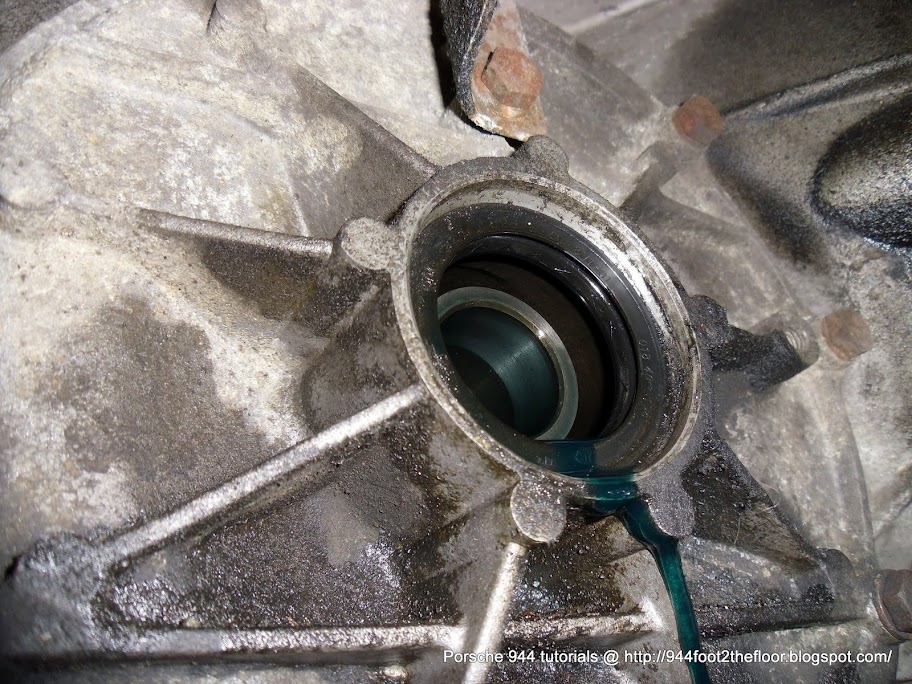
Now we can see the large black coloured seal we are going to remove. I used a small heeled pry bar (or you can use a seal puller or other hooked instrument) to gently work around the seal and ease it out. Be careful when doing so as the blind side of the seal that you can't see contains and elasticated spring and it's easy to leave this behind in the transmission. Keep at it and the seal will eventually come out.
(Seal before removal)
(Blind-side of seal and elasticated spring)

(Seal removed)
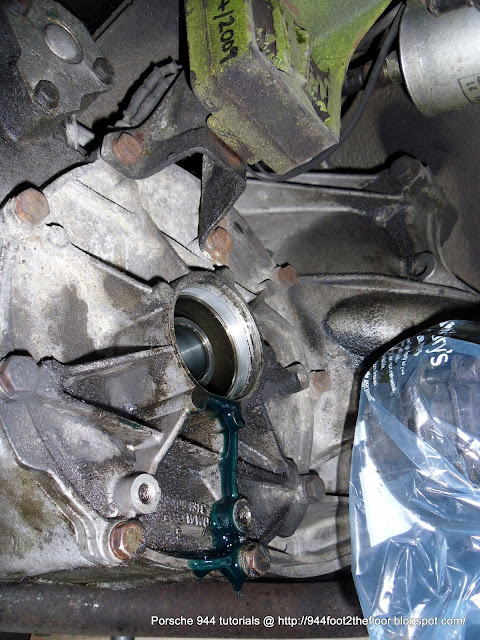
Once removed it's a good idea to thoroughly clean the area so that no grit or muck enters the transmission when you come to install the new seal.
Here you can see the new seal (left) alongside the old seal (right)

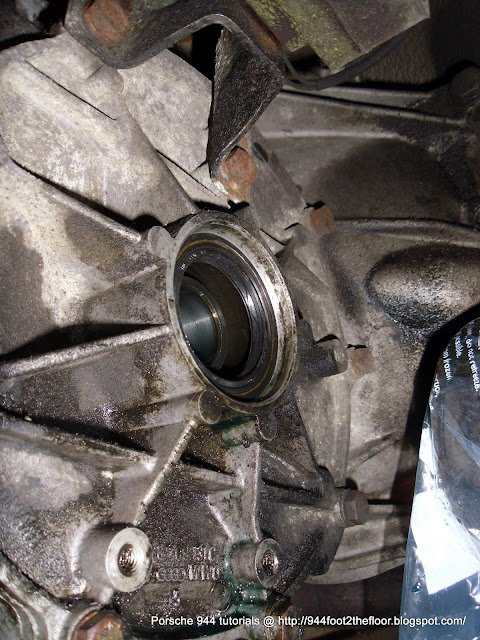
You are now ready to install the new seal. Before you do so, take note of the small raised lip (see arrow below) that the new seal must press up against inside the seal hole. Now take a small amount of white spirit and lightly rub some of it around the outer edge of the black seal (this aids fitting and will shortly evaporate). Now press the seal squarely into the hole making sure the spring is facing in towards the transmissions internals. Now take a 38-40mm socket and a rubber mallet and gently tap the seal into place making sure it doesn't skew as you knock it in. Use your fingers every now and again to feel around the inside of the seal to see when it is fully pressed up against the lip on the inside.
Photo below shows a 38mm socket compared to the size of the seal.

And photo below shows the seal correctly fitted.
Now you can re-install the flanged axle and re-attach the drive axle shaft. You may also want to take this opportunity to refresh the grease in the CV joint at the end of the drive axle before reattachment.
Now all that remains is to repeat the procedure for the other side before refilling the transmission gear oil.
could you provide some pertinent details about the socket being used to push the seal in - e.g. how much of a contact it makes, how many points,... - I don't want to get a huge socket and realize it isn't shaped right - thanks in advance!
ReplyDeleteThe 38mm socket made contact all the way around the seal, I was just extremely careful to keep it central at all times. 38mm was the largest socket I happened to have in my toolbox, if I was going to go out and buy one specifically for the job I would probably go for 40mm or 42mm.
Deleteoh also - can you specify the outer and inner diameter of the seals that the socket (or press) has to match (presumably you did this already and it is about 40 and 38 mm respectively)? thanks!
ReplyDeleteI'm afraid I don't have that information, the inner diameter is definitely less than 38mm, I would guess it is around 36-34mm. Hope that helps.
DeleteThe seal outer is 60mm and the inner is 45mm the outer diameter of the 38 socket is bigger than 45mm. What about the grease between the inner and outer lip to help with lubrication and prevent ingress of dirt to the inner lip?
DeleteInner 45mm outer 60mm as per the picture, remember the grease between the inner and outer lip.
Delete