THE WHY
The rubber hatch pin seals on my 944 had clearly seen better days (no surprise considering my 944 is nearly 30 years old) but other more pressing repairs and maintenance had meant they'd never reached the top of the priority list, until now. So taking advantage of the lull in critical maintenance I thought I'd tackle this little matter whilst all was calm. I'd also read on some forums that new seals also helps with the action of the automatic hatch release as well as preventing water getting into the hatch locks.
THE TASK
You will need the following:
Washing up liquid
Plastic bike tyre lever or a flat bladed screwdriver
THE HOW TO
(Amateur mechanic job time approx. 30mins to 1 hour)
The first thing to do was to acquire some new seals as the last thing you want to do is dig out the old ones (and probably destroy them in the process) and not have anything to put back in. I sourced a pair of new ones from 944online, the seals are different each side so you need to make sure you get a left and a right one. Part numbers for my 944/1 were 944 512 365 01 & 944 512 366 01
Having got the new seals I proceeded to dig out the old ones with a small flat bladed screwdriver to expose the bare locking mechanism beneath as shown below. Also gave it a good clean and dry inside to remove gunk build up. You also need to pop off the main hatch seal along the lower edge to aid access when it comes to inserting the new hatch latching seals.

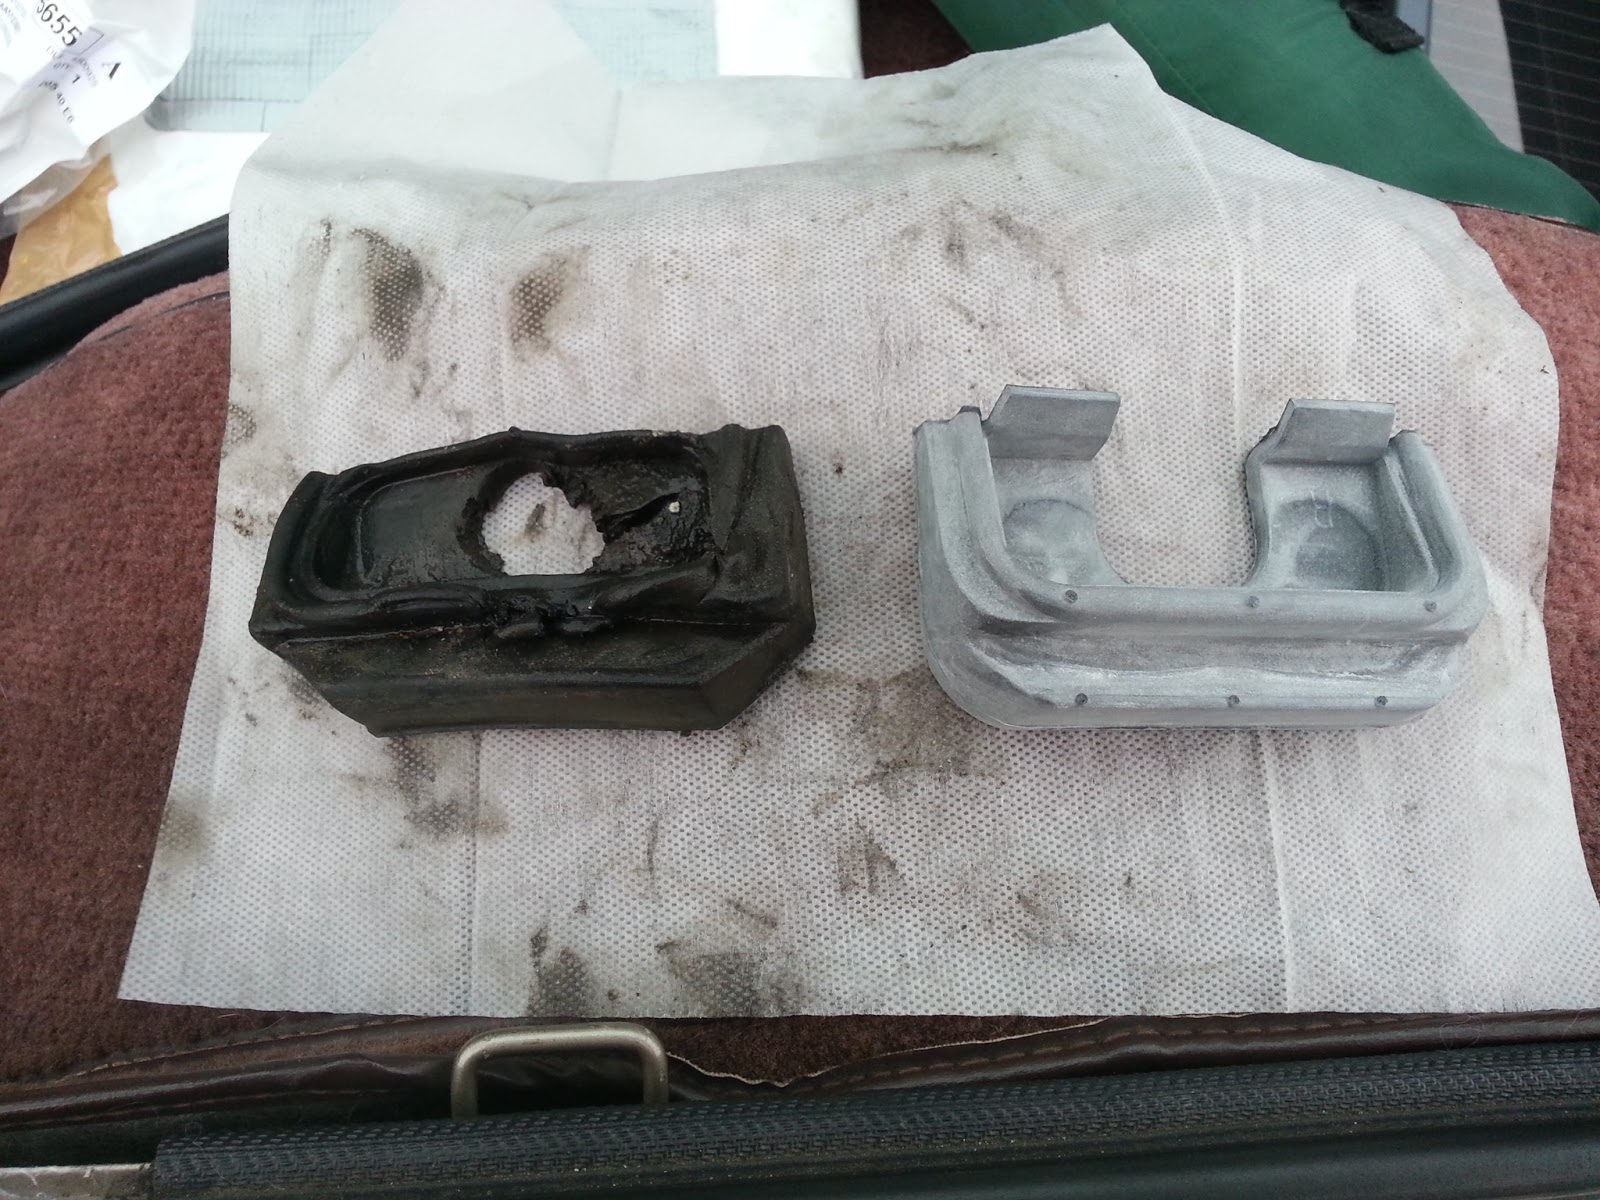
Here's a shot of one of slightly tired seals next to one of the new ones, you can see a slight difference in design along the top edge (probably one of Porsche's many part upgrades)

Before you begin to press in the new seals take not of the back edge, as you can see the seal is shallower one end than the other.

Fortunately Porsche also mark the seal L or R on the top in case you get mixed up (marking inside orange circle below)

To make the fitting process as easy as possible rub some washing up liquid on the surface of the seal and around the opening of the bodywork, this helps it slide in easier. I found it was best to push the inner corner of the seal (see blue arrows above) first then ease the rest in as best you can. I used a plastic bicycle tyre lever to get the seal to sit properly under the bodywork, massaging it in gently bit-by-bit. Be careful not to push too hard otherwise you'll split the rubber even on these new seals.
Once both seals are in you may need to let out the hatch pins a little to accommodate the un-squashed fresh rubber.
The rubber hatch pin seals on my 944 had clearly seen better days (no surprise considering my 944 is nearly 30 years old) but other more pressing repairs and maintenance had meant they'd never reached the top of the priority list, until now. So taking advantage of the lull in critical maintenance I thought I'd tackle this little matter whilst all was calm. I'd also read on some forums that new seals also helps with the action of the automatic hatch release as well as preventing water getting into the hatch locks.
THE TASK
You will need the following:
Washing up liquid
Plastic bike tyre lever or a flat bladed screwdriver
THE HOW TO
(Amateur mechanic job time approx. 30mins to 1 hour)
The first thing to do was to acquire some new seals as the last thing you want to do is dig out the old ones (and probably destroy them in the process) and not have anything to put back in. I sourced a pair of new ones from 944online, the seals are different each side so you need to make sure you get a left and a right one. Part numbers for my 944/1 were 944 512 365 01 & 944 512 366 01
Having got the new seals I proceeded to dig out the old ones with a small flat bladed screwdriver to expose the bare locking mechanism beneath as shown below. Also gave it a good clean and dry inside to remove gunk build up. You also need to pop off the main hatch seal along the lower edge to aid access when it comes to inserting the new hatch latching seals.

Here's a shot of one of slightly tired seals next to one of the new ones, you can see a slight difference in design along the top edge (probably one of Porsche's many part upgrades)
Before you begin to press in the new seals take not of the back edge, as you can see the seal is shallower one end than the other.

Fortunately Porsche also mark the seal L or R on the top in case you get mixed up (marking inside orange circle below)

To make the fitting process as easy as possible rub some washing up liquid on the surface of the seal and around the opening of the bodywork, this helps it slide in easier. I found it was best to push the inner corner of the seal (see blue arrows above) first then ease the rest in as best you can. I used a plastic bicycle tyre lever to get the seal to sit properly under the bodywork, massaging it in gently bit-by-bit. Be careful not to push too hard otherwise you'll split the rubber even on these new seals.
Once both seals are in you may need to let out the hatch pins a little to accommodate the un-squashed fresh rubber.